


Way back in June, Bing gave us an early Christmas present: the ability to auto tag URLs in Bing AdCenter. While this may seem like a long time coming, we here at Mad Fish definitely welcomed the productivity improvements that come with not having to manually add our own UTM tags.
Adding UTM tags to Bing ads is necessary because Google Analytics does not automatically import them the same way it does AdWords ads. Without tags, you won’t be able to see campaign level metrics, or really any metrics beyond the number of clicks you received from the Bing/CPC referral source.
Below is a step-by-step explanation on how to enable auto-tagging in Bing so you never have to bother with adding them manually again!
Step 1:
Open Bing AdCenter
In the upper right hand corner you will see a sprocket icon – click on that and select Accounts & Billing:
 If you are an agency that manages multiple Bing accounts (as we do) this page will provide you a list of your accounts. Select the one you want by clicking the Account Number of the account you want to enable tagging on.
Step 2:
In the next screen click the pencil icon that is next to Account:
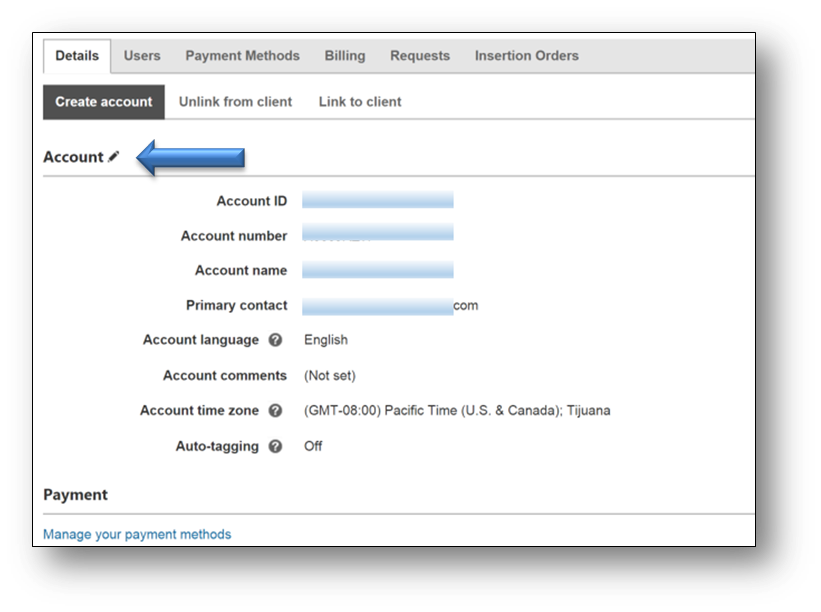
This will open up your account settings options. You should see an option called Auto-tagging:
 Step 3:
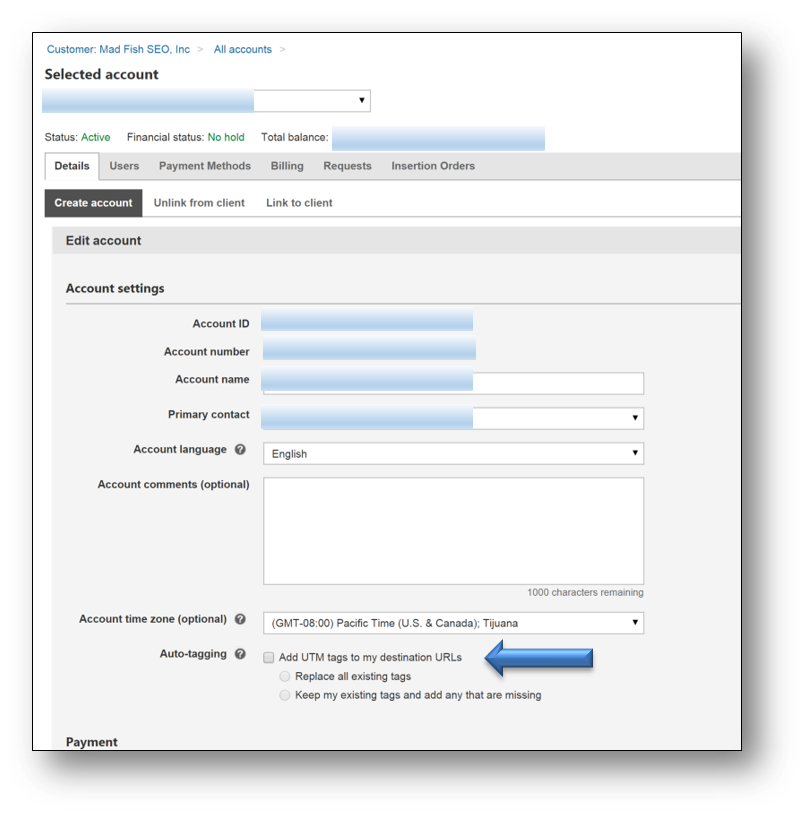
Select “Add UTM tags to my destination URLs”
Beneath this you have a couple of options:
- If you have not spent any time tagging your ads you will select option one to replace all existing tags (since there aren’t any or they aren’t very well thought out).
- If you have spent a great deal of time tagging your ads just the way you want them already, you can select option two to keep your existing tags and add missing. Keep in mind that the UTM protocol you have established with your manual tags may not be consistent with the UTM tags that Bing provides.
