How do I pull data layer variables from GTM?
If you have worked with Google Tag Manager, then you are most likely familiar with the “Data layer.” The data layer is a JavaScript object that is used for storing and passing information from your website to your Google Tag Manager container. It acts as a central repository where all the data your tags might need is stored. This makes it easier to manage and deploy marketing and analytics tags on your website without having to modify the code each time.
Have you ever needed to create a new data layer variable in Google tag manager, but were not sure of the exact data layer variable name, or how to map your variable to that portion of the data layer?
You can use the below tool to easily convert the data layer preview from Google tag manager into the proper data layer variable names that can be used in mapping GTM variables.
Pull Data Layer Variable Names Directly from Google Tag Manager Output
Raw Data Layer Input
Data layer Variable Names
A list of data layer variables will appear here after your data layer has been pasted into the text area on the left
How to Convert and Map Google Tag Manager Data Layer Values into Variables
How to map your website’s data layer to Google tag manager (GTM) data layer variables
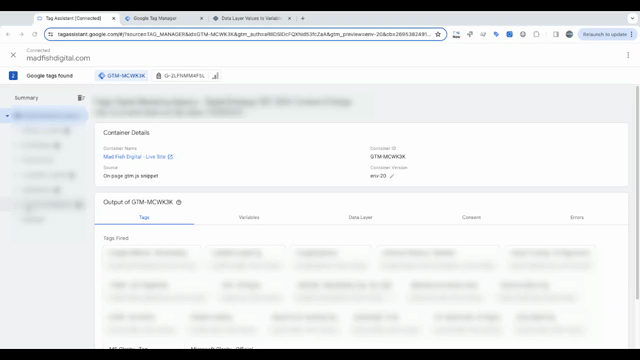
- Launch the “preview” mode in Google tag manager of your website
- Navigate to the webpage that contains the data layer you wish to map
- Once loaded, select the “Data Layer” tab in the GTM preview mode
- Copy the entire contents of the the box labeled “Current values of the Data Layer:”
- Goto the “Mad Fish Digital data layer values conversion tool”, and paste in the contents into the text box on the left side
Your mapped variable names should appear in the right side column!
What are the Three Most Important Areas of Google Tag Manager?
When working with Google Tag Manager, the three most common areas you work within are the tags, triggers, and variables.
Tags
In Google tag manager, ‘tags’ are snippets of code or tracking pixels from third-party tools (like Google Analytics 4, Facebook ads, etc…) that are added to a website to collect and send specific information to these tools. By using Google tag manager to add and edit tags, most marketers are able to add and edit the tags for a website without the need for a web developer. This saves both time and money, and allows marketers to more quickly deploy events, conversion pixels, important automations and tracking technologies that provide valuable feedback for ads, website content, on-page user experience and more.
Example: A Google Analytics tag is configured in GTM to send pageview information to Google Analytics. You can set up multiple tags to send data to different tools and services.
Triggers
Triggers determine when a tag should be executed or fired. Triggers can be thought of as a set of rules that marketers define in GTM for when a tag is fired. When specific rules are met, the associated tags are triggered and executed. Triggers can be based on various actions or events, such as a page load, a click on a button, successful form submissions, or even (my favorite) a custom event.
Example: you could create a trigger that fires a Google Analytics 4 event every time a user clicks on a specific link or button on your website.
Variables
Variables in Google tag manager are used for storing and passing information to tags and triggers. Variables can be thought of as placeholders or containers for values that are used within tags and triggers. Variables are used to dynamically update and pass information into tag and trigger configurations.
Example: instead of hardcoding a specific value into a tag or trigger, you can use a variable that changes based on the user’s interaction with the website. This allows you to simply use one tag to track all the link clicks in your navigation, rather than creating an individual tag for each link.
Example GA4 data layer Purchase Event for Shopify
Google Tag Manager Data Layer Event Code for Ecommerce
<script>
// Replace these values with actual data from your Shopify order
var purchaseData = {
event: "purchase",
ecommerce: {
purchase: {
actionField: {
id: "{{ order.id }}", // Replace with the order ID variable from Shopify
affiliation: "Store Name", // Replace with your store name
revenue: {{ order.total_price | money_without_currency | remove: ',' }}, // Replace with the total order price variable from Shopify
currency: "{{ shop.currency }}", // Replace with the currency code variable from Shopify
},
products: [
{% for line_item in order.line_items %}
{
id: "{{ line_item.product_id }}", // Replace with the product ID variable from Shopify
name: "{{ line_item.title }}", // Replace with the product title variable from Shopify
quantity: {{ line_item.quantity }}, // Replace with the quantity variable from Shopify
price: {{ line_item.price | money_without_currency | remove: ',' }} // Replace with the product price variable from Shopify
},
{% endfor %}
]
}
}

};

// Push the purchase event data to the dataLayer
window.dataLayer = window.dataLayer || [];
window.dataLayer.push(purchaseData);
</script>
What is the Data layer?
The data layer in Google Tag Manager (GTM) is a JavaScript object used for storing and passing information from your website to your GTM container. It is a valuable tool for managing how data is handled within Google tag manager.
The data layer in GTM offers a powerful and flexible way to manage and transmit data from your website to your GTM container, facilitating more effective and accurate data tracking and analysis.
There are eight key aspects to consider when passing data sets through a Data Layer for GTM:
- Central Data Repository: The data layer serves as a central repository where all of the data that you want track in GTM is stored. This can include items such as: user interactions, e-commerce data, or any custom information relevant to your goals and tracking needs.
- Decoupling Data from Tags: By using a data layer, you can separate the data collection from the actual tags. This means that you can dynamically push information to the data layer without having to directly integrate each piece of data with individual tags, making your GTM setup more flexible and maintainable.
- Structured Data Handling: The data layer allows for an improved data structure and better organization for data handling. You are able to define and structure your data in a way that makes it easier to use and access within GTM for triggering tags and populating variables.
- Event-Driven Data Collection: The data layer is used to capture and store data based on specific events on your website, like form submissions, product views, or add-to-cart actions. This event-driven approach is particularly useful for tracking complex user interactions, and passing them through to platforms such as Google Analytics 4, a customer data platform such as Tealium.
- Customization and Extensibility: The data layer is highly customizable. You can tailor the data layer to include any data sets you require, such as user details, transaction information, or a page’s metadata.
- Enhanced Tag Management: With the data layer, you can create more precise and powerful triggers in GTM. Your tags can fire based on the specific data or events you define in the data layer, allowing for more targeted and efficient data collection.
- Implementation: To implement a data layer, you will need add a JavaScript object to your web pages. This object is typically initialized before the GTM container code.
- For example:
<script type="text/javascript">
    dataLayer = [{
      'pageTitle': 'Homepage',
      'pageCategory': 'Men\'s Clothing'
    }];
</script>
You can then push information to the data layer as users interact with your site:
<script type="text/javascript">
    dataLayer.push({
      'event': 'buttonClick',
      'buttonName': 'Subscribe Now'
    });
</script>
- For example:
- Integration with GTM: In GTM, you create data layer variables to retrieve values from the on-page data layer. These variables can then be used in your tags and triggers. An example is when you might create a trigger that fires a GA4 event tag whenever a specific event, such as ‘buttonClick’, is pushed to the data layer.
Why is the Data Layer Useful?
The data layer in Google Tag Manager (GTM) is extremely useful. It can be most useful in managing and optimizing the way data is handled and transferred within a web environment for tracking and analytics purposes.
The data layer in GTM offers enhanced control, flexibility, precision, and efficiency in how data is handled for web tracking and analytics. It facilitates better collaboration between different teams and contributes to more robust and scalable data tracking setups.
Here are some key reasons why the data layer is useful in GTM:
- Improved Data Management: The data layer provides a structured and centralized way to manage the data you want to track. This centralization makes it easier to control and manipulate the data flow to your analytics and marketing tools.
- Separation of Data from Implementation: By using a data layer, marketers are able decouple the data from the HTML and JavaScript code of your website. This means changes in tracking requirements can often be made in GTM without needing to repeatedly alter the website’s code, which can be especially beneficial for large sites or when you don’t have easy access to modify the site’s source code.
- Enhanced Flexibility and Scalability: The data layer allows for the passing of dynamic data. Marketers are able to push real-time data such as user interactions or e-commerce transactions, to the data layer in real-time as they happen. This flexibility is great for scaling your tracking setup as your site evolves and as your tracking needs change.
- Customization and Precision in Tag Firing: With the data layer, you can create more precise triggers in GTM with more robust information. Tags can be configured to fire based on specific conditions or data points present in the data layer, allowing for more targeted and accurate tracking.
- Reduced Errors and Increased Consistency: By standardizing the data collection process through a data layer, you reduce the likelihood of errors that can occur with multiple tags trying to capture data in different ways. This standardization increases the overall accuracy, consistency, and reliability of a website’s data.
- Enhanced Performance: Minimizing the direct impact and need to make edits a website’s source code can also positively affect site performance. Once the data layer javascript has been implemented to the website, future changes are made and tested within GTM and not on the website itself. This minimizes the risk of accidentally introducing code that might slow down the site or result in a bug.
- Easier Collaboration and Maintenance: For enterprise level teams, using the data layer simplifies collaboration between web developers, who can focus on correctly implementing the data layer, and the marketing or analytics teams can focus on properly configuring GTM tags and triggers to track the ideal data sets based on the data layer.
- Compliance and Data Privacy: With increasing emphasis on data privacy and compliance with regulations like GDPR, a data layer can help in managing user consent and data collection preferences more effectively. It allows for more controlled and compliant data handling practices.